Showing posts with label Decorate. Show all posts

Making a House a Home: Part II

October 18, 2010

To save some $$ (and to feed my inner crafter), I've decided to make throw pillows for our sofas.  I've started/finished a few using this fabric:


It's a greyish/brown color- very neutral- and I really love the simplicity of the print. 

Also, I bought a rug (!!!).  I drove all over Austin last weekend of search of something, and almost came home with nothing.  It's not what I had really hoped for, but it's a quick (temporary) fix and it was cheap.  The downside(s) are that 1) it's not wool (you can read this informative post on wool rugs) and 2) it's neutral.  So, I'm hoping to now add color to the room through the use of throw pillows and accents on our coffee/end tables.

I looooove these.


I think I'm going to stay away from patterns, but I like the idea of pillow embelishments like these:


I could easily sew (not crochet) some flowers for our living room pillows that could be removable/changed out.

Share/Save/Bookmark

Fancy Pots

April 20, 2010

I love plants.  And gardens.  And pretty much anything green and flowery.  Several years ago, I attempted to sprucen up some plain terra cotta pots with some acrylic paint.  They've held up pretty well because they house indoor plants, but I doubt they would have lasted as long outdoors.  Then I found this lovely picture via Modish.


Aren't they gorgeous?  Jena posted a great tutorial on how to prep & paint terra cotta pots so that they withstand the outdoor elements.  I think I may have to put this tutorial to use this weekend, if the weather stays nice.

Here is my version of a fancy pot.  I made some similar to these to hold the table assignments for our wedding reception.  (If you follow me here, you've probably already seen this tutorial :) )

IMG_3613

Materials:
Terra cotta pots, ribbon, hot glue gun
IMG_3588

Tutorial:
Start by hot gluing one end of the ribbon to the pot (picture 1), then pull the ribbon straight down along the side of your pot, holding it on the glued edge, so it doesn’t move around (2).  Make sure once more that the ribbon is straight, then place a glue line along the bottom edge of the pot (3) and press the center of the ribbon down first, then pull either side further in and press down so that the ribbon curves to the pot (4).  I should also note that I left the ribbon on the spool while gluing it to the pot and only cut after the end of the ribbon was glued to the bottom of the pot.

IMG_3597IMG_3598IMG_3599IMG_3605

Repeat steps 1-4 for each quadrant of the pot.  I glued the first two across from each other, and likewise with the second two so that there was even spacing amongst all the strips:

IMG_3606IMG_3607

Then repeat steps 1-4, gluing two ribbon strips between each quadrant strip:

IMG_3610

Do this until your entire pot is covered.  I personally like the overall look of darker ribbon because it is less see through, but that’s just me.  After the pots were covered, I went back and hot glued these thinner ribbons using the same method.


IMG_3616

I would love to plant some herbs in these tiny pots, although I'm not sure how the ribbon would hold up against moist dirt- I don't want it to get moldy.  I may have to line them with something (a plastic bag? foil?) before using them as planters.


Or they would also make for some cute containers for my craft room.

IMG_3618

Share/Save/Bookmark

I Wanna Bake Sweets

February 18, 2010

I grew up making cupcakes in boring, pastel-colored liners.  Of course those days are long gone.  I came across Bake it Pretty via Marta Writes and was absolutely amazed by the new, seemingly endless options to make baking pretty.  I am loving the bright colors and patterns.


Not into cupcakes?  They also have a pretty great selection cookie cutters on their site too. (I'm especially smitten with the bottom two :) )


I would love to put some of these items to use- I just need to think up a good excuse to purchase them.....

Share/Save/Bookmark

A Modern House...

February 11, 2010

...for your pet. 
While browsing for some indoor/outdoor dog houses for our dear basset hound Kingsley, I found these two that I fell in love with.
Hand-made and modern?  Yes please- this one is available here.  I love that it is versatile and blends into the decor naturally.  Of course, Kingsley would need something a little larger, but I think it is definitly something that could be done (maybe by me?  because I surely can't afford this one).


I love the roof planters on these two.  Perfect for the season, no?


What would your "dream" pet house be?

Share/Save/Bookmark

Obsessed with Chirp

November 19, 2009

When X & I started a gift registery almost ten months ago for our wedding, I fell completely head over heels in love with this china:


"Chirp" by Lenox

Luckily my now husband lets me make most of the decor decisions around here and he let me have my dream y china.  I was a little concerned that it might be too colorful or not fancy enough, but I think I may love it even more today than I did ten months ago!  It was brought to my attention that they have actually expanded the line to include the following items (that I want need to buy right. now.):

I always enjoy my coffee or tea a little more when it is served in a tall mug.


Birds + salt & pepper shakers? Yes, please.


This hot cocoa mug and matching spoon would be the perfect pick-me-up on a cold, winter day.


We still need a set of these anyway, it would be nice if they matched our china.


This teapot is too cute to need any explanation.


A perfect ornamen t choice for our first Christmas as a married couple.


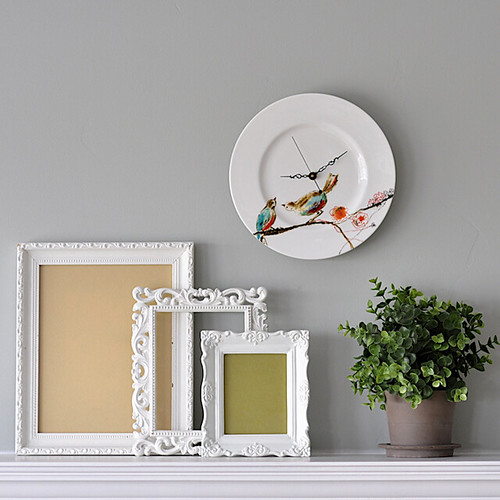
And finally, I came across this creation on decor8, from Etsy seller FaireHoure.  All of her clocks are really beautiful, but I was obviously drawn to this one.


Share/Save/Bookmark

Organization

March 14, 2009

Last weekend we made a trip up to IKEA in search of more storage for my craft room (which was being taken over by wedding crap,,,,er, supplies). Even though I could have bought a lot more, I limited myself to this:

source

The Billy Bookcase, BB. And yes, I know that I am the last one to get on this train, but I really don't care. Even though I only bought one, I would love to have many some day so that I can recreate this:


source


Who wouldn't want a library in their home? Anyway, I digress. At this point, I am using BB for craft storage not books. Some before and after pics:


I moved the lovely red bookcase to the other side of the room and put the BB in its place:


Ahh, much better. I love reorganization. My only complaint about this purchase is that it has to be attached to the wall,,, it will fall over if it is not attached, which is a bit scary for me. Oooh and while we were at IKEA we also got this for cheap-cheap,


because you can't shop at IKEA and just by one item. This is my new favorite. I love french-coffee-press coffee.

Share/Save/Bookmark